世界のやまさ

SEKAI NO YAMASA

Microsoft Azure で使用している仮想マシンのコア数を調べる -リソースマネージャ(ARM)版-

Microsoft Azure では使いすぎるのを防止するために、クォータ(コア数上限)が設定されています。クラシックとリソースマネージャ(ARM)でそれぞれ違うのですが、今回はリソースマネージャで調べてみました。

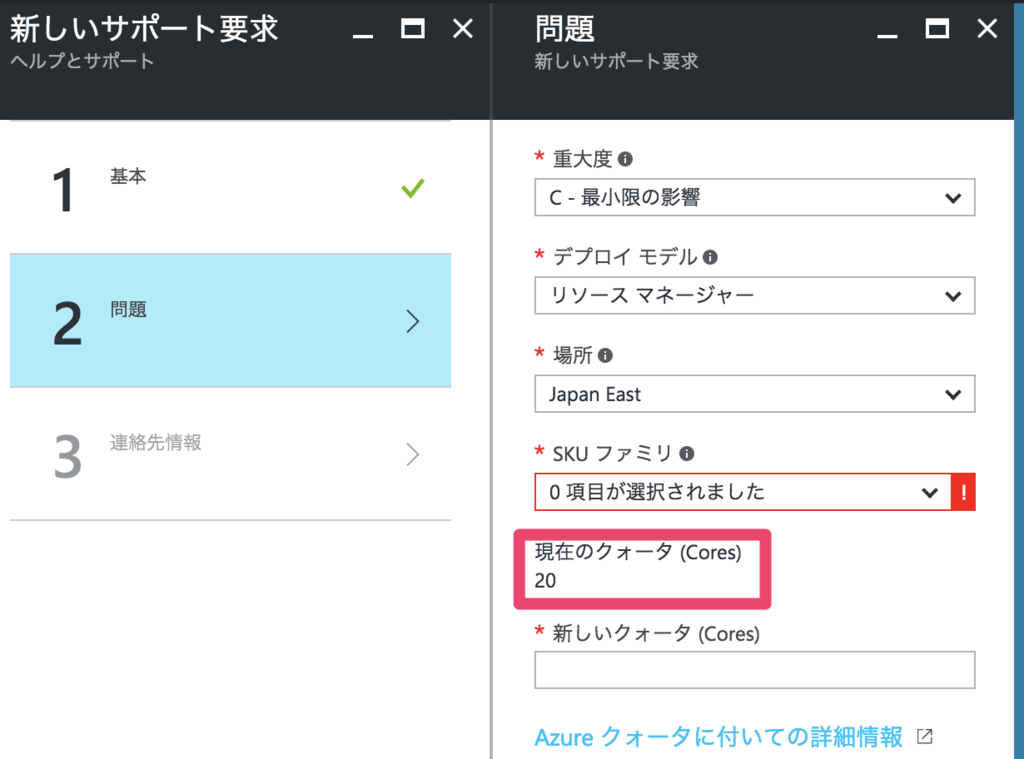
リソースマネージャの場合、リージョンごとにデフォルトだと20コアまでです。20コアでは足りない場合はAzure ポータル (https://portal.azure.com/) の[ヘルプとサポート] から個別にリクエストして増やしてもらう必要があります。リクエストの方法はリンク先を参照してください。

blogs.msdn.microsoft.com

先の[ヘルプとサポート] から[新しいサポート要求]をたどっていくとコア数上限は表示されるのですが、現在使用しているコア数は表示されませんでした。

f:id:nnasaki:20170112213200p:plain

Azure CLIを使う

ポータルでは現在使用しているコア数は確認出来ないようなので、PowerShellかAzure CLIを使います。今回はmacOSを使用しているので、Azure CLIを使って確認することにしました。Azure CLIもNode.jsベースのものと新しいPythonベースの2.0(プレビュー)(https://github.com/Azure/azure-cli)があります。せっかくなんで新しい方を使ってみることにしました。

インストール

色々方法はあるようですが、Dockerが簡単そうだったのでDockerにしました。

Dockerインストール

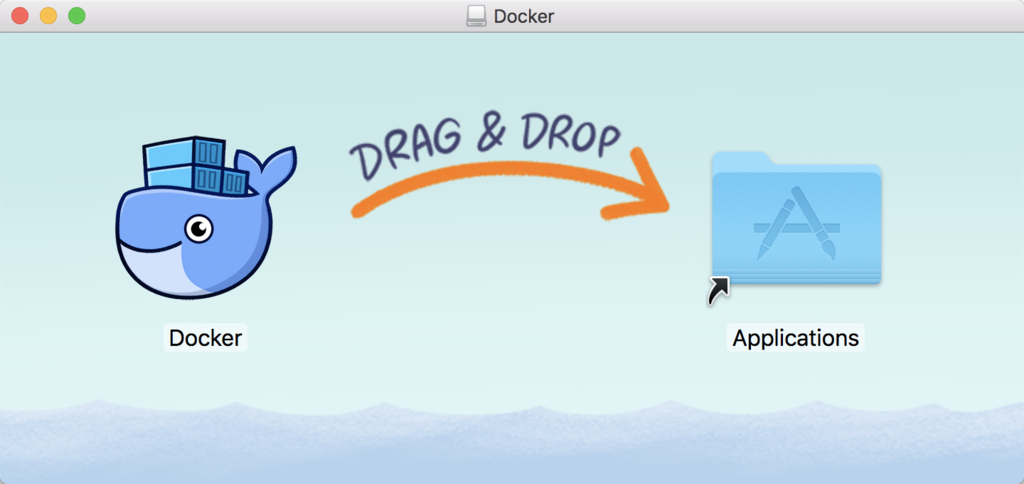
macOSだと http://docker.com からイメージを落として、次のようにドラッグアンドドロップします。

f:id:nnasaki:20170112220018p:plain

あとは普通に起動して設定して終わりです。

Azure CLI 2.0(プレビュー)のインストール

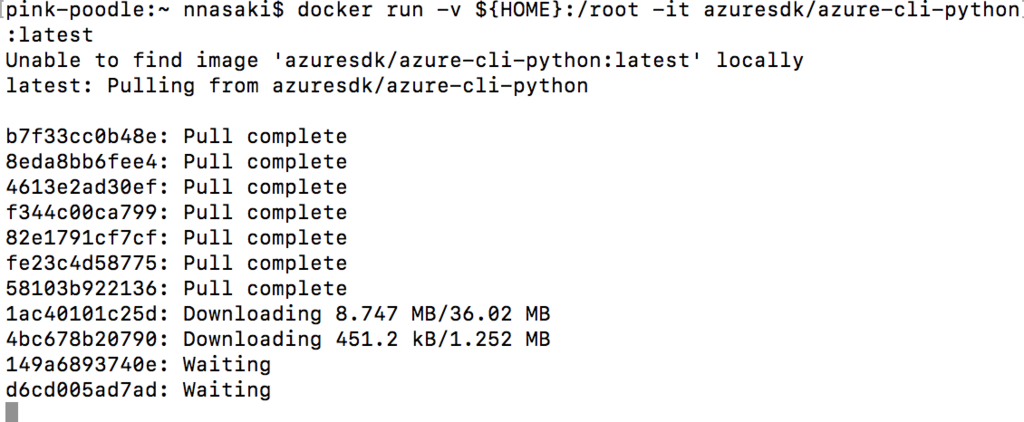
次のコマンドをターミナルから実行します。

docker run -v ${HOME}:/root -it azuresdk/azure-cli-python:latest

するとこんな感じでインストールされます。1分もかかりません。

f:id:nnasaki:20170112215204p:plain

Azure CLIの設定

Azure CLIから自分のアカウントにアクセスできるようにloginします。

az login

とすると次のメッセージが出ます。

f:id:nnasaki:20170112220318p:plain

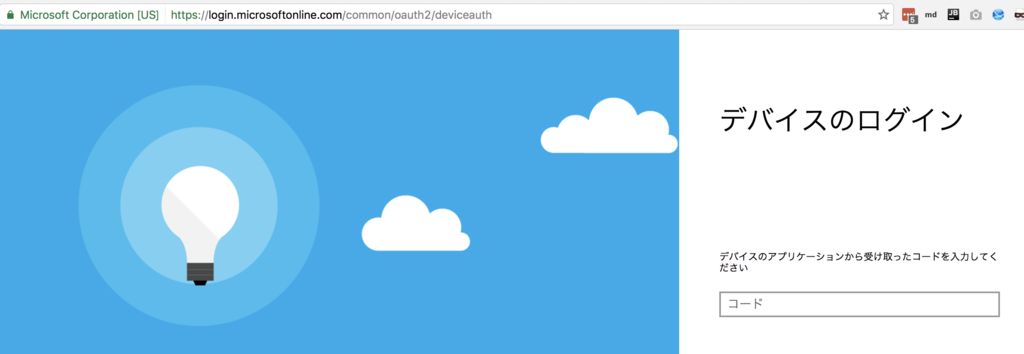
https://aka.ms/devicelogin をブラウザ開き、code を入力すると認証が完了します。

f:id:nnasaki:20170112220436p:plain

ブラウザで入力してから1分ほど待っているとコマンドが自動で終了して、使用出来る状態になります。

Azure CLI を使ってコア数の上限を調べる

東日本リージョンで調べてみましょう。

az vm list-usage --location japaneast

と、実行すると次のようにjsonでズラッと表示されます。(省略して記載しています。)

localizedValueのTotal Regional Coresで、currentValueが現在使用しているコア数、limitがコア数の上限です。

[
  {
    "currentValue": 0,
    "limit": 2000,
    "name": {
      "localizedValue": "Availability Sets",
      "value": "availabilitySets"
    }
  },
  {
    "currentValue": 2,
    "limit": 20,
    "name": {
      "localizedValue": "Total Regional Cores",
      "value": "cores"
    }
  },

jsonが見にくいというひとは、output オプションで list を指定してあげるとちょっと見やすくなります。

az vm list-usage --output list  --location japaneast
Current Value : 0
Limit         : 2000
Name          :
   Localized Value : Availability Sets
   Value           : availabilitySets

Current Value : 2
Limit         : 20
Name          :
   Localized Value : Total Regional Cores
   Value           : cores

table だと数字だけでちょっと残念な表示になってしまいました。

az vm list-usage --output table  --location japaneast
  Limit
-------
   2000
     20

まとめ

Azure CLI 2.0(https://github.com/Azure/azure-cli) は便利なので積極的に使っていきたいなぁと思います。

Azure Functions は Storage Blob のトリガーをリアルタイムサポートして欲しい

f:id:nnasaki:20160402124131p:plain

Azure Functions が発表されました。

azure.microsoft.com

日本でも実際に使ってみた人がもういますので、詳細はそちらをご参照ください。

blog.xin9le.net

tech.guitarrapc.com

大変良いサービスだと思ってます。AWSに合って無かった機能の1つでもあるので。

これで、例えばストレージに画像を上げたらサムネイルを作成するといったことが簡単に出来るようになると思います。*1

で、今回のタイトルにもなっている「Azure Functions は Storage Blob のトリガーをリアルタイムサポートをして欲しい」はそのまま内容です。

現状、Azure Functions における Storage Blob トリガーはリアルタイム性は保証されておらず、ベストエフォートとなっています。つまり、イベントの発火の遅延は避けられないという状況です。

詳細は次のドキュメントの"Azure Storage - blob trigger"の項目に書いてあります。

Note: The Functions runtime scans log files to watch for new or changed blobs. This process is not real-time; a function might not get triggered until several minutes or longer after the blob is created. In addition, storage logs are created on a "best efforts" basis; there is no guarantee that all events will be captured. Under some conditions, logs might be missed. If the speed and reliability limitations of blob triggers are not acceptable for your application, the recommended method is to create a queue message when you create the blob, and use a queue trigger instead of a blob trigger to process the blob.

azure.microsoft.com

ストレージのログをウォッチしてイベントを発火しており、ストレージのログが即座に作成されることは保証されておらず、「ベストエフォート」となっています。もし、即座性を担保したければキューを使えということですが、いちいちキューを使うのは面倒くさいというのが人情です。

どうすれば良いの?

現状はキューを使うしかないです。でも、そこは改善してほしいので、feedbackをしましたので、共感してくれる人は Vote お願いします!

How can we improve Microsoft Azure Functions?
  • 1 vote
  • 0 comments

Should be support real-time Storage blob triggers

Azure Functions is awesome! I'd like to propose for more convenience.
Currently, Storage blob triggers do NOT support real-time. Because write at
"https://azure.microsoft.com/en-us/documentation/articles/functions-reference/"

"The Functions runtime scans log files to watch for new or change...

feedback.azure.com

Azure は英語になってしまいますが、こんな感じで欲しい機能はどんどんオープンに要求できます。皆さんの Vote が多いほど、開発される優先度があがりますので、是非ともよろしくお願いします。

余談

ちなみに今一番多い Vote は Clear DB やめて Azure で MySQL 用意しろって奴みたいですね… Amazon と Google には既に用意されているので、当然な要求ですよねぇ。 PostgreSQL もあるとうれしーなー。

f:id:nnasaki:20160402123838p:plain

*1:実際はスクリプトからImageMagickを呼び出せるかとか検証が必要ですが

Parse から Azure に移行する方法

先日 SWWDC 仙台iPhoneとか開発者勉強会 その26 - 新春ライトニングトーク大会 - : ATND にて、LTをさせていただきました。

ちょうど前日にParseがサービス終了するというアナウンスがあったので、「Parse難民よ、Azureを使おう」というちょっとキャッチーなタイトルを付けましたが、中身は Azure Mobile App の説明です。

続きを読む

Cloud Foundry on Azure に Spring Boot をデプロイする

f:id:nnasaki:20151211212212p:plain

前回はセットアップを進めただけで、 cf コマンドまで動かせない状態でした。

blog.nnasaki.com

どうしようも無くわからなかったので、 Github でダメ元で聞いてみたら、親切丁寧にサポートしてもらえて cf login までうまく動かせるようになりました。どうやら、 DNS に BIND を使っているようで、 テンプレートファイルから IP を変えていたので DNS がうまく動いていなかったようです。

github.com

しかし、私の英語は本当に中学生以下ですが、やりたいことはなんとなく伝わって良かったです。

DNS の設定方法

次のドキュメントを参考にして、 setup_dns.py をダウンロード。

github.com

以下コマンドをdevboxで実行。IPはパブリックIPにより変わります。

sudo python setup_dns.py -d cf.azurelovecf.com -i 10.0.0.5 -e 40.74.xxx.xxx -n 40.74.xxx.xxx

cf login コマンドの実行

devbox で以下コマンドを実行

cf login -a https://api.cf.azurelovecf.com --skip-ssl-validation

ユーザー名パスワードを聞かれるので、デフォルトは次の通り

Email>  admin
Password> c1oudc0w

次の通り出力されればログイン成功

Authenticating...
OK

Targeted org default_organization


API endpoint:   https://api.cf.azurelovecf.com (API version: 2.42.0)   
User:           admin   
Org:            default_organization   
Space:          No space targeted, use 'cf target -s SPACE'   

Spring Boot アプリをデプロイする

次の記事を参考に、Spring Boot のアプリケーションをデプロイします。Pivotal Cloud Foundry 向けの説明ですが、cf コマンドは共通なので、Open な Cloud Foundry でも同じように動きます。

qiita.com

Space を作る

アプリを置く場所に Space というものが必要みたいなので、次のコマンドを実行して作ります。すべてdevbox上で作業します。

$ cf create-space sandbox
Creating space sandbox in org default_organization as admin...
OK
Assigning role SpaceManager to user admin in org default_organization / space sandbox as admin...
OK
Assigning role SpaceDeveloper to user admin in org default_organization / space sandbox as admin...
OK

TIP: Use 'cf target -o "default_organization" -s "sandbox"' to target new space

成功したら、TIP のとおり cf target で作成した space を使うようにする

$ cf target -o "default_organization" -s "sandbox"
                   
API endpoint:   https://api.cf.azurelovecf.com (API version: 2.42.0)   
User:           admin   
Org:            default_organization   
Space:          sandbox   

JDK をセットアップする

JDKが入っていないので、次の記事を参考に Oracle JDK をセットアップする。 qiita.com

ソースをクローンしてビルドする

$ git clone https://github.com/making/hello-pws
$ cd hello-pws
$ ./mvnw package

パッケージをPUSHする

次のコマンドで Cloud Foundry にパッケージをデプロイします。 Starting app hello-pws in org default_organization / space sandbox as admin... のところでやたら待たされて不安になりましたが、待っていたら進みました。

$ cf push hello-pws -p target/hello-pws.jar -m 256M

Creating app hello-pws in org default_organization / space sandbox as admin...
OK

Creating route hello-pws.cf.azurelovecf.com...
OK

Binding hello-pws.cf.azurelovecf.com to hello-pws...
OK

Uploading hello-pws...
Uploading app files from: target/hello-pws.jar
Uploading 13.2M, 109 files
Done uploading               
OK

Starting app hello-pws in org default_organization / space sandbox as admin...
-----> Downloaded app package (12M)
-----> Java Buildpack Version: v3.3.1 | https://github.com/cloudfoundry/java-buildpack.git#063836b
-----> Downloading Open Jdk JRE 1.8.0_65 from https://download.run.pivotal.io/openjdk/trusty/x86_64/openjdk-1.8.0_65.tar.gz (3.8s)
       Expanding Open Jdk JRE to .java-buildpack/open_jdk_jre (1.8s)
-----> Downloading Open JDK Like Memory Calculator 2.0.1_RELEASE from https://download.run.pivotal.io/memory-calculator/trusty/x86_64/memory-calculator-2.0.1_RELEASE.tar.gz (0.1s)
       Memory Settings: -Xss853K -Xmx160M -XX:MetaspaceSize=64M -Xms160M -XX:MaxMetaspaceSize=64M
-----> Downloading Spring Auto Reconfiguration 1.10.0_RELEASE from https://download.run.pivotal.io/auto-reconfiguration/auto-reconfiguration-1.10.0_RELEASE.jar (0.5s)

-----> Uploading droplet (57M)

0 of 1 instances running, 1 starting
1 of 1 instances running

App started


OK

App hello-pws was started using this command `CALCULATED_MEMORY=$($PWD/.java-buildpack/open_jdk_jre/bin/java-buildpack-memory-calculator-2.0.1_RELEASE -memorySizes=metaspace:64m.. -memoryWeights=heap:75,metaspace:10,native:10,stack:5 -memoryInitials=heap:100%,metaspace:100% -totMemory=$MEMORY_LIMIT) && SERVER_PORT=$PORT $PWD/.java-buildpack/open_jdk_jre/bin/java -cp $PWD/.:$PWD/.java-buildpack/spring_auto_reconfiguration/spring_auto_reconfiguration-1.10.0_RELEASE.jar -Djava.io.tmpdir=$TMPDIR -XX:OnOutOfMemoryError=$PWD/.java-buildpack/open_jdk_jre/bin/killjava.sh $CALCULATED_MEMORY org.springframework.boot.loader.JarLauncher`

Showing health and status for app hello-pws in org default_organization / space sandbox as admin...
OK

requested state: started
instances: 1/1
usage: 256M x 1 instances
urls: hello-pws.cf.azurelovecf.com
last uploaded: Mon Dec 21 11:49:44 UTC 2015
stack: cflinuxfs2
buildpack: java-buildpack=v3.3.1-https://github.com/cloudfoundry/java-buildpack.git#063836b java-main open-jdk-like-jre=1.8.0_65 open-jdk-like-memory-calculator=2.0.1_RELEASE spring-auto-reconfiguration=1.10.0_RELEASE

     state     since                    cpu    memory           disk         details   
#0   running   2015-12-21 11:54:38 AM   0.0%   222.3M of 256M   135M of 1G      

curl で動作を確認する

curl で動作を確認します。レスポンスがあったときは嬉しくて小さくガッツポーズしてしました。

$ curl http://hello-pws.cf.azurelovecf.com
Hello from 10.0.0.5:61001

まとめ

なんとか Cloud Foundry にアプリケーションをデプロイするところまでたどり着けました。スケールさせたりとか、DBを作ったりとかはまだわからないので、引き続き調べます。

参考