記事目次
- 【Spring 4.0.5対応】Spring Boot と Spring MVC と Spring Data JPA を使って Web API を作成する (1)
- 【Spring 4.0.5対応】Spring Boot と Spring MVC と Spring Data JPA を使って Web API を作成する (2)
- 【Spring 4.0.5対応】Spring Boot と Spring MVC と Spring Data JPA を使って Web API を作成する (3)
今回使用するソース
https://github.com/nnasaki/spring-rest/tree/1
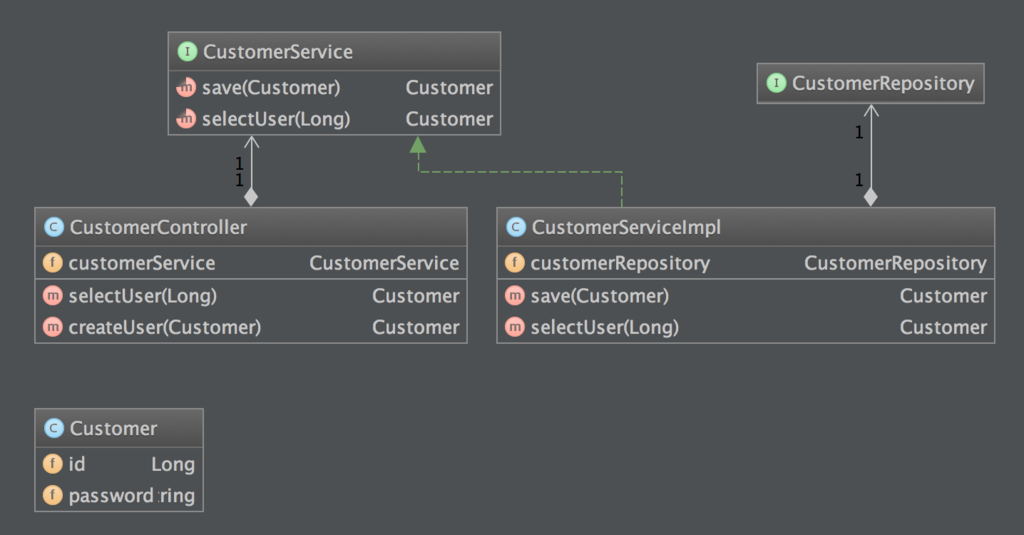
1回目の続きです。こんな感じのをつくります。
どんな動きをするか見てみよう
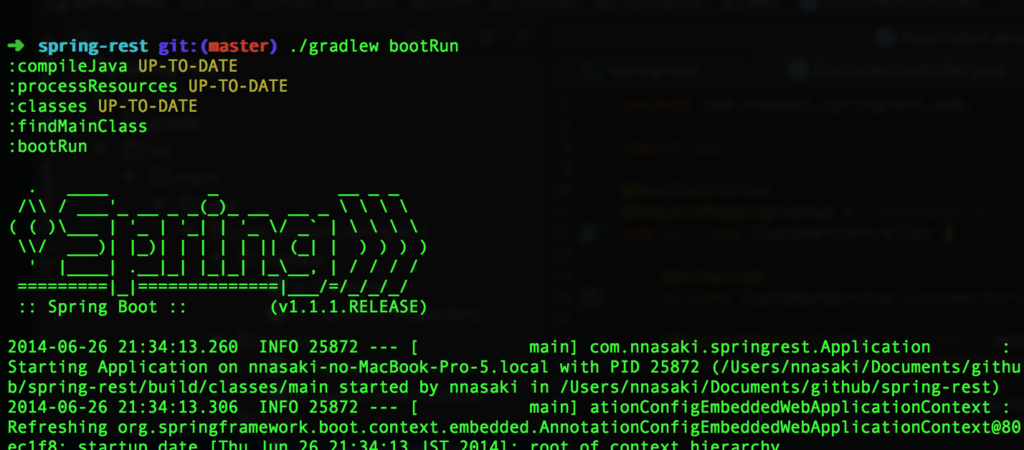
ソースは Github に置きました。。ソースを落としてきて、 ./gradlew bootRun すれば次のような感じでサーバーが立ち上がると思います。
http://localhost:8080/customer に対して { "password": "test_password" }' を POSTしますとユーザーが作られます。

http://localhost:8080/customer/1 に対して GET すると、次のようなレスポンスが返却されます。
{
    id: 1
    password: "test_password"
}

ソース解説
どんな動きをするか見ていただいたので、ソースの詳細を説明していきます。 次のような順番で説明します。
- ビルドスクリプト(build.gradle)
- 構成ファイル(Application)
- コントローラー(CustomerController)
- サービス(CustomerService)
- リポジトリ(CustomerRepository)
- エンティティ(Customer)
ビルドスクリプト(build.gradle)
ビルドはGradleを使います。
dependencies {
    compile("org.springframework.boot:spring-boot-starter-web")
    compile("org.springframework.boot:spring-boot-starter-data-jpa")
    runtime 'com.h2database:h2'
    testCompile 'org.springframework.boot:spring-boot-starter-test'
}
必要なコンポーネントは spring-boot-starter-web, spring-boot-starter-data-jpa, h2, spring-boot-starter-test の4つだけです。
構成ファイル(Application)
web.xml の代わりになります。アノテーションで@EnableAutoConfiguration がいい感じに設定してくれます。
@Configuration
@ComponentScan
@EnableJpaRepositories
@EnableAutoConfiguration
public class Application {

    public static void main(String[] args) {
        SpringApplication.run(Application.class, args);
    }
}
コントローラー(CustomerController)
URLの制御を行い、サービスを呼び出します。面倒なURLのパスのマッピングはアノテーションで記載でき、これだけで済みます。便利。
@RestController
@RequestMapping(value = "/customer")
public class CustomerController {

    @Autowired
    private CustomerService customerService;

    @RequestMapping(value = "/{id}", method = RequestMethod.GET)
    public Customer selectUser(@PathVariable Long id) {
        return customerService.selectUser(id);
    }

    @RequestMapping(method = RequestMethod.POST)
    public Customer createUser(@RequestBody @Valid final Customer customer) {
        return customerService.save(customer);
    }

}
サービス(CustomerService)
サービスは単純なインターフェースなので、実装クラスの CustomerServiceImpl で説明します。単純にリポジトリを呼んでいるだけですが、本来ならばビジネスロジックをここにいろいろ書きます。
@Service
public class CustomerServiceImpl implements CustomerService {

    @Qualifier("customerRepository")
    @Autowired
    private CustomerRepository customerRepository;

    public CustomerServiceImpl() {
    }

    public CustomerServiceImpl(CustomerRepository customerRepository) {
        this.customerRepository = customerRepository;
    }

    @Override
    public Customer save(Customer customer) {
        return customerRepository.save(customer);
    }

    @Override
    public Customer selectUser(Long id) {
        return customerRepository.findOne(id);
    }
}
リポジトリ(CustomerRepository)
今回の一番の見所!
@Repository
public interface CustomerRepository extends JpaRepository<Customer, Long>{
}
DBへのアクセスはエンティティ(Customer)と主キーを JpaRepository<Customer, Long> で指定するだけです。あとはインジェクションされて、
保存のsave()メソッドや検索のfindOne()が動きます。全件取得のfindAll()やページング、ソートもできます。ただの interface のくせに!
これは結構衝撃的でした。また、デザイン面でも interface なのでロジックをリポジトリにごちゃっと書くことも無いので、良い制約だなと思いました。
尚、JpaRepositoryが一番高級でページングとかいらなければ、CrudRepositoryでも良いです。リポジトリの関連はこんな感じ

エンティティ(Customer)
最後です。
@Entity
public class Customer {

    @Id
    @GeneratedValue(strategy = GenerationType.AUTO)
    public Long id;

    @NotNull
    @Size(max = 64)
    public String password;
}
Class名がテーブル名、メンバ変数がフィールド名になります。フィールドは public にすることで、Getter/Setter は要らない模様。 @Idが主キー、@GeneratedValueでシーケンスを設定。
次回
今回のソースをベースにDB周りを実装して拡充していきたいと思います。一対多、多対一、多対多とかをやります。
情報源
とても詳解。本当にオライリー読んでるような感じだった。
- Spring Boot Reference Guide
- Tutorial · Designing and Implementing RESTful Web Services with Spring
- Tutorial · Data Access with Spring
- Bootstrap an application with Spring Boot – Part2 Web application | Mathias Hauser